


Why Do I Write on This Topic?
While there are many experienced beaders out there, every now and then I get a customer who is new to beading and needs advice on getting started. A beaded bracelet is one of the simplest, inexpensive beading projects without the need for any beading tools.
You will need:
-
- Your beads
- Clean towel (or bead board if you have one)
- Beading elastic (good quality)- I can’t fault the Griffin brand. Choose a width that will fit into the smallest hole in your beads, and still allows you room to hide a knot in one of them – see item 8 below
- Beading glue
- Pair of scissors
- Tape measure

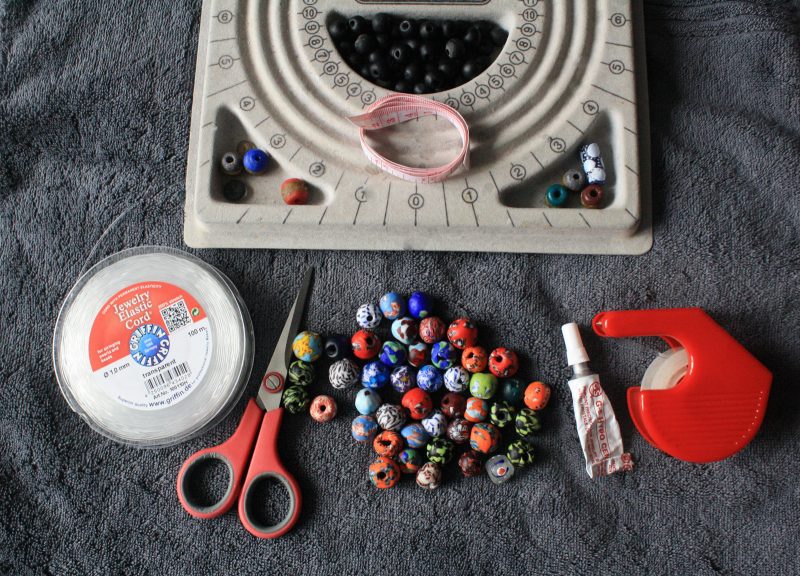
bead board/towel, tape measure, elastic cord, scissorts, beads, beading blue and tape
Steps:
- Decide length of finished bracelet ( eg. 6 inches)
- Measure where on your wrist or ankle you want it to sit, add extra for comfort (6.5 inches for my bracelet)
- To get the length of beading cord, add about 6-8 inches to finished bracelet length you need (12-14 inches in this example).
- On a towel (or bead board) arrange the beads in order in which you want them to be in finished bracelet. (If using a bead board start from the zero mark in the middle and arrange your beads on either side of it to get the length you need) ennsurig one of the beads at the end is big enough to hide a secure knot of the elastic.
-

- arrange your beads on bead board starting from 0 in the middle
-

- arrange beads on towel in the order you want them
5. If you’re not using a bead board measure arranged beads to be certain it’s the length you want, allwing about half inch extra to accommodate securing the elastic.
6. Put a bit of tape at one end.
-

- measure length of arranged beads

-

- a bit of tape at one end secures your beads while you work

7. Using the other end string arranged beads on to the string.
8. Carefully bring the ends of the elastic together and tie a surgeon’s knot. (there are many online videos on this) I aim to make it big enough to fit snug in the bead hole.

bring the two ends of the elastic together
9. Apply some beading glue all around this knot. Wipe off any excess glue on your beads and fingers immediately, following glue instructions.
10. Holding one end of the excess elastic in each hand, gently pull the two ends of the elastic string to secure the knot.
11. Gently pull the knot into the end bead, and trim the excess cord so the string is flush with the bead. Be careful not to cut the elastic on which the beads are strung!
12. Now pull the elastic a bit more to hide the knot completely and well inside the bead (you don’t want any elastic sticking out!)
13. Leave it to dry following guidelines on the glue packaging.
-

- before trimming elastic ensure the knot is completely hiddlen
-

- finished bracelet: leave to dry according to glue instructions